
Create, manage, and monitor your active grows with Cultivation Cycles — including setup, measurements, events, plant health tracking, and the dashboard.
Cultivation Cycle
The Cultivation Cycles section brings together all the tools to create, track, and manage your cultivation cycles.
Creating a Cycle
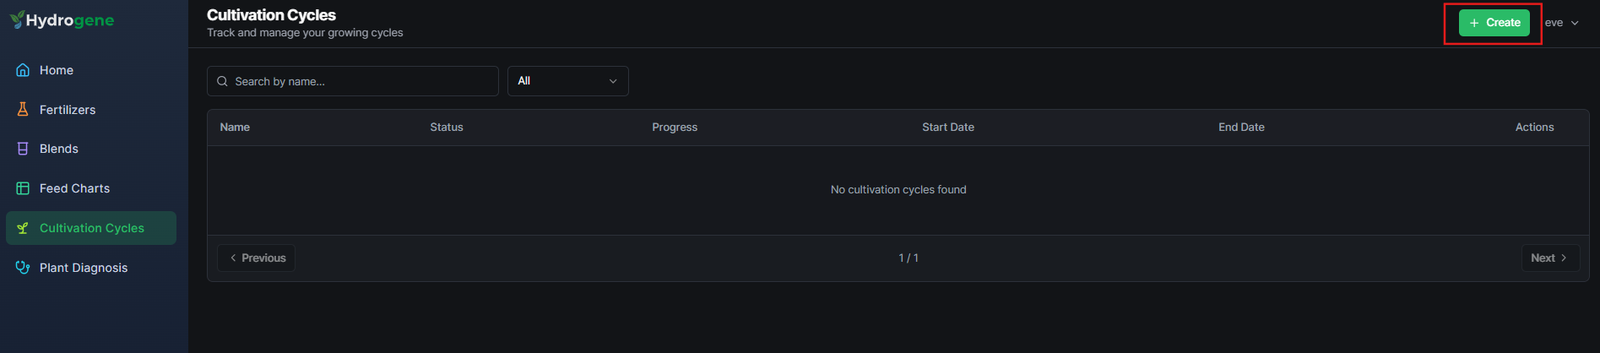
Step 1 — Growing Setup
-
Click the + Create button.
-
In the Growing Setup step, fill in the following information:
Field Description Crop Type The type of plant you are growing Growing Medium Soil, coco, rockwool, DWC, etc. Tank Volume (L) Total reservoir volume in liters System Type Your irrigation/delivery system type Number of Plants Total plant count in this cycle Substrate Volume (L) Volume of substrate per plant (if applicable)
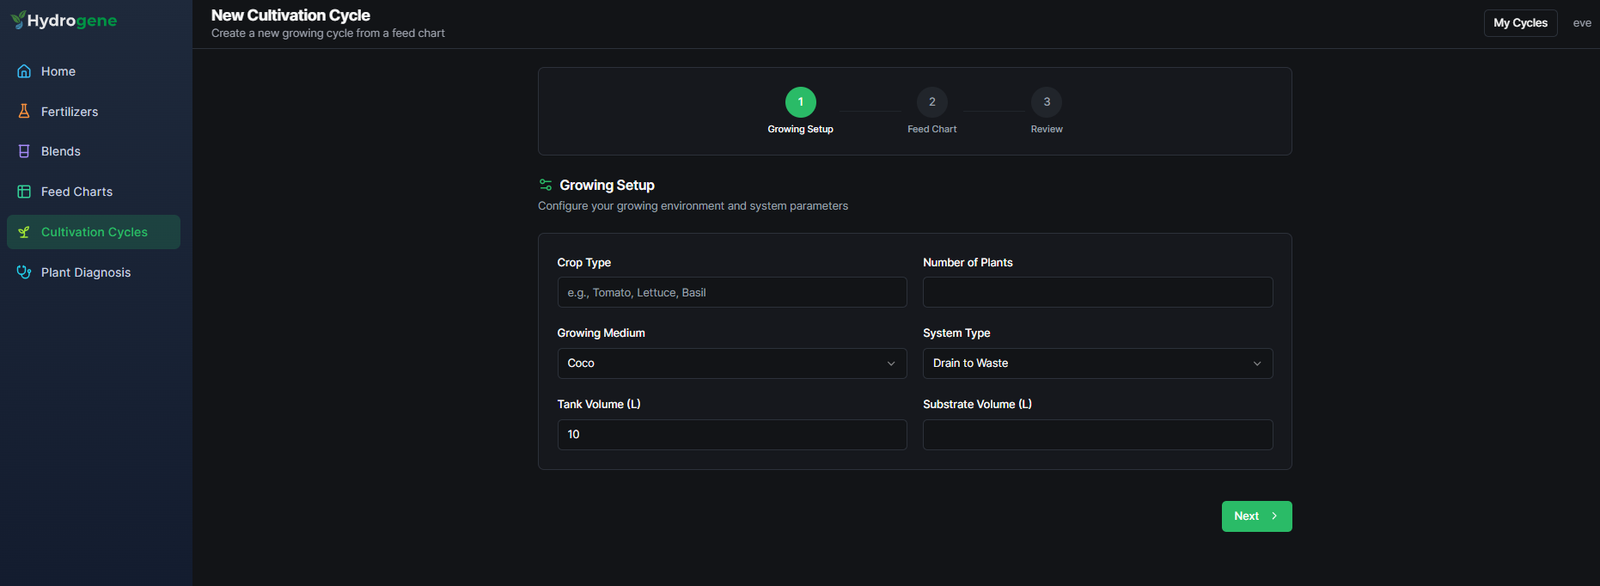
Step 2 — Select Feed Chart
In step 2, select the desired Feed Chart.
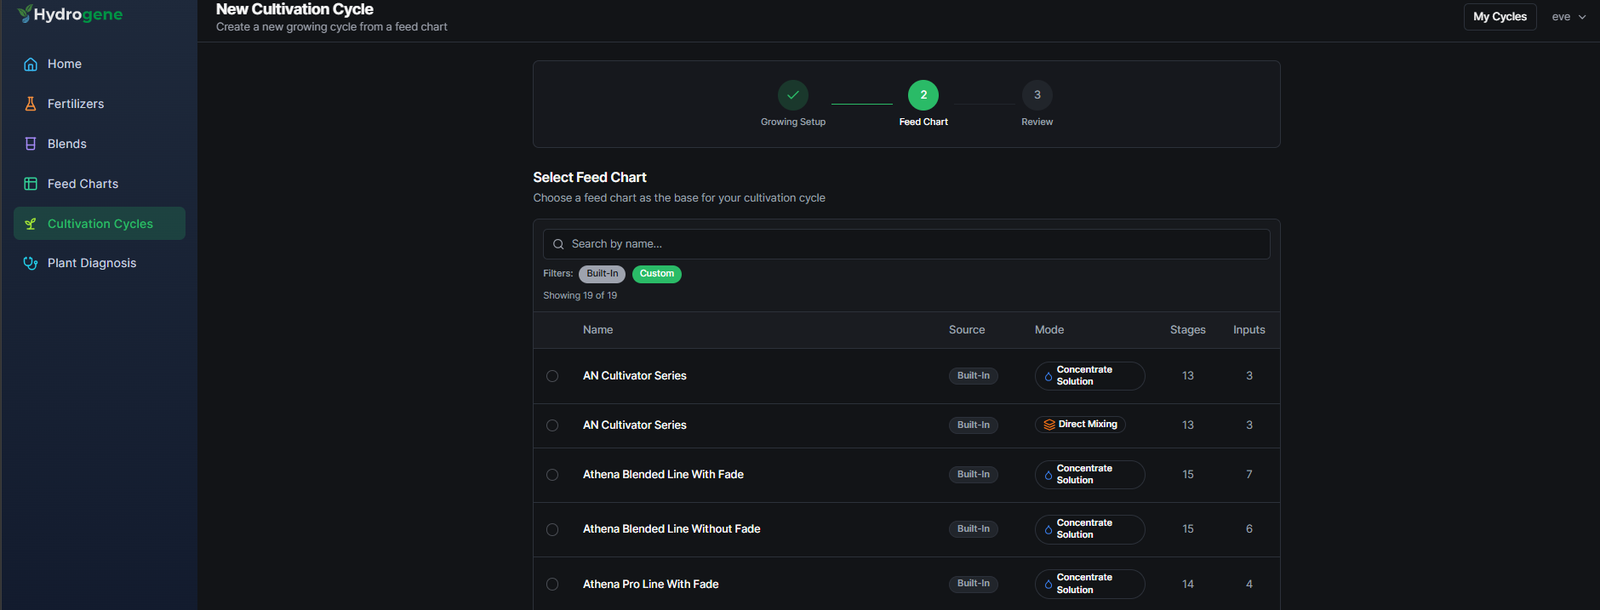
Step 3 — Review and Save
In step 3 (Review), review the information and click Save to save the Cultivation Cycle.
Starting the Cycle
After saving, go to the Overview tab and click Start Cycle to begin the cycle.
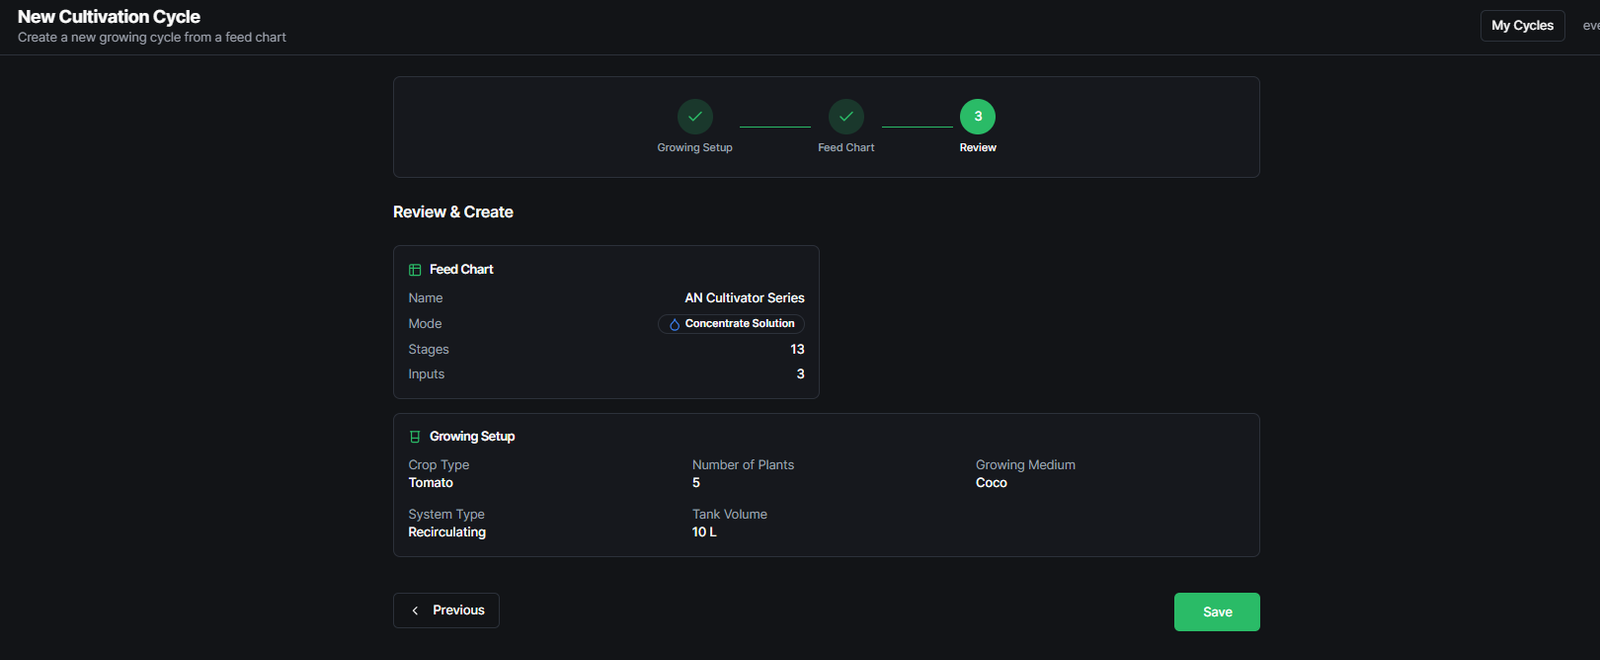
For greater accuracy in cultivation tracking, start the cycle in the system at the same time the real cycle begins.
Overview Tab
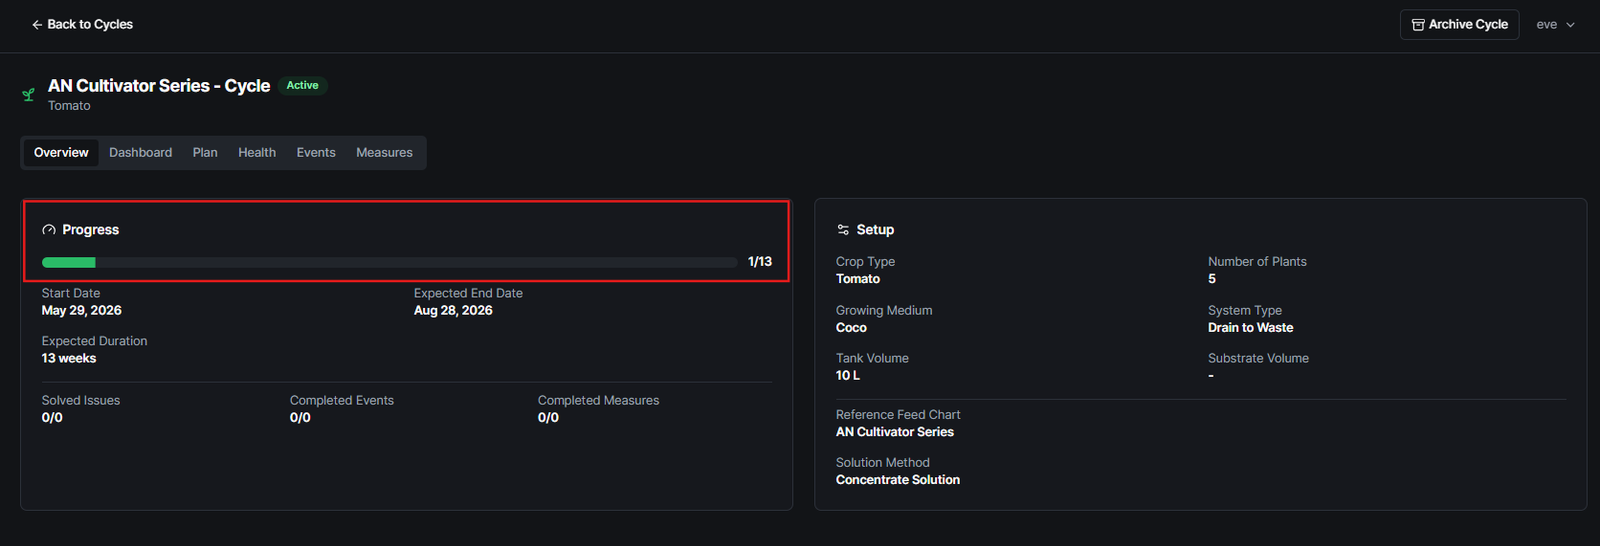
In the Overview tab, you can monitor the progress of the cultivation cycle with information on projected start, end, and expected duration.
Measures Tab
The Measures tab is for recording cultivation measurements. It is essential to enter data, dates, and plant identification correctly so that the information is displayed accurately in the Dashboard.
To add a measurement, follow these steps:
- Click the + Create button.
- Choose Plan Measurement to schedule a future measurement, or Record Measurement to record one that has already been taken.
-
After choosing the appropriate option, fill in the Measurement form:
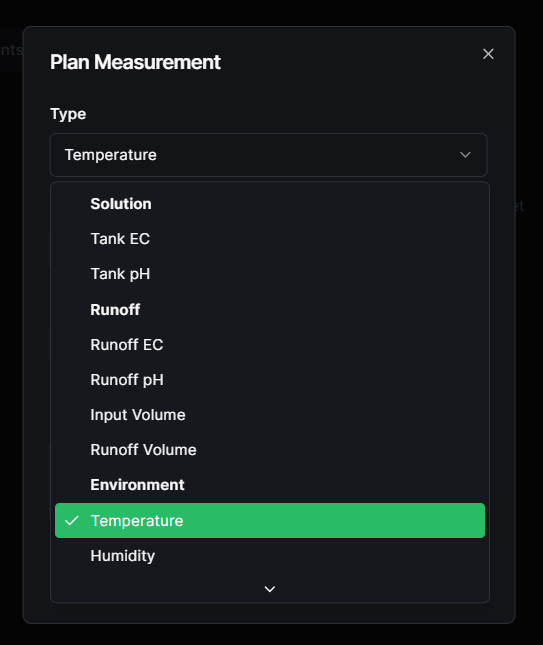
- Select the measurement variable from the available list.
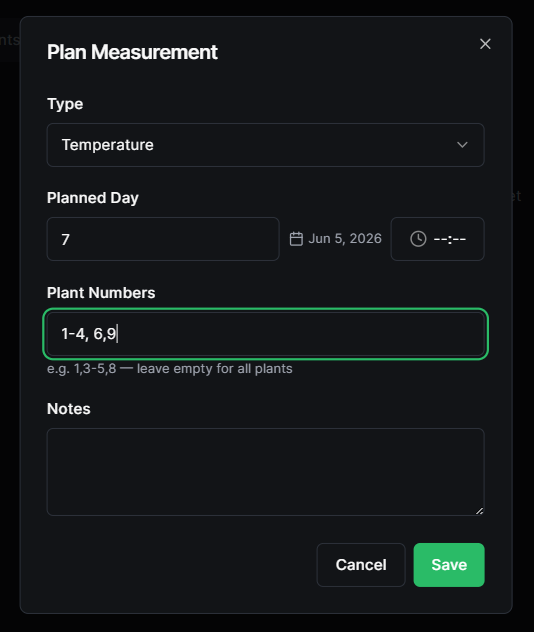
- Enter the cultivation day on which the measurement will be taken.
The date with day, month, and year will appear automatically alongside the cultivation day.
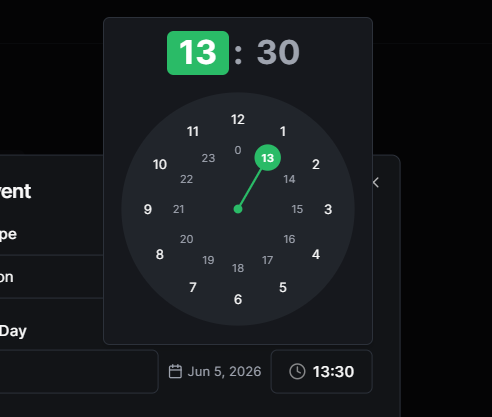
- Add the planned time for the measurement.
Select the hour first, then the minutes on the clock.
- Enter the identification number of the plants the measurement refers to.
For sequential plants, use a hyphen (e.g.,
1-4). For individual plants, use commas (e.g.,6, 9).
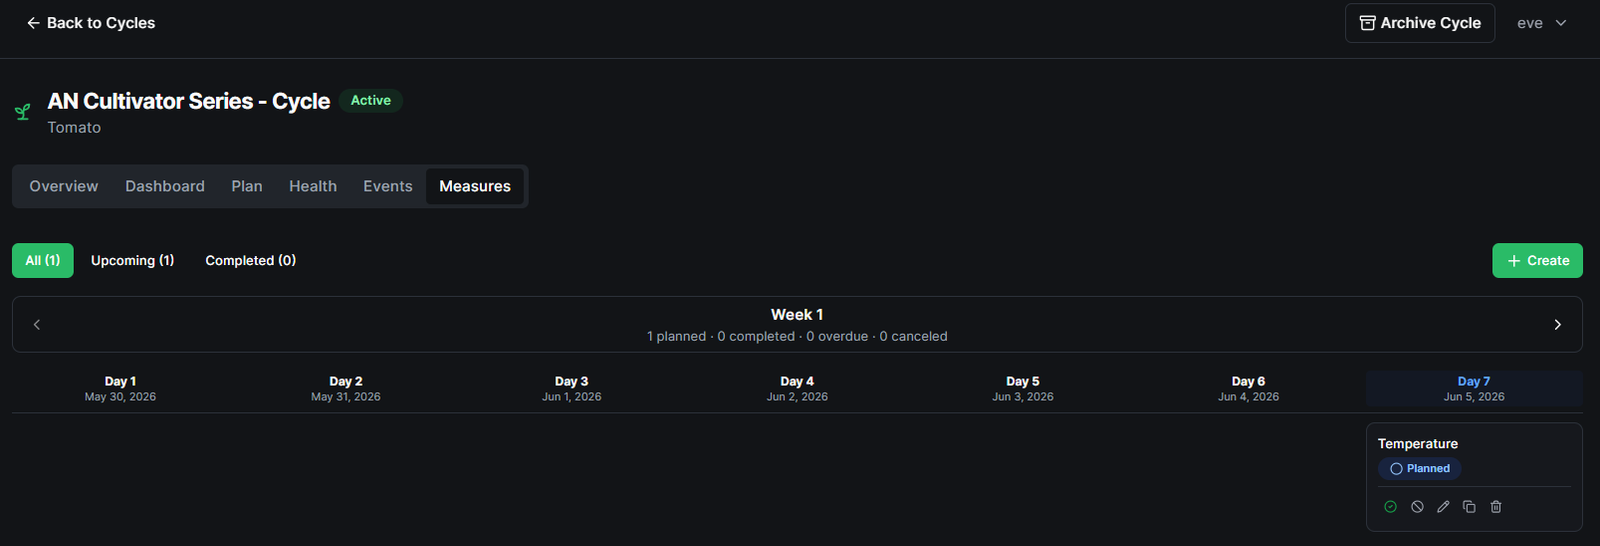
- Click Save. The created measurement will be displayed as a card with a blue Planned tag in the Measures calendar.
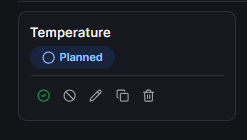
- Using the icons at the bottom of the measurement card, you can:
- Conclude it (green Concluded tag)
- Cancel it (red Cancelled tag)
- Edit, duplicate, or delete it
Dashboard Tab
In the Dashboard tab, you can monitor the most important cultivation variables entered in the Measures tab, such as EC, pH, temperature, and humidity.
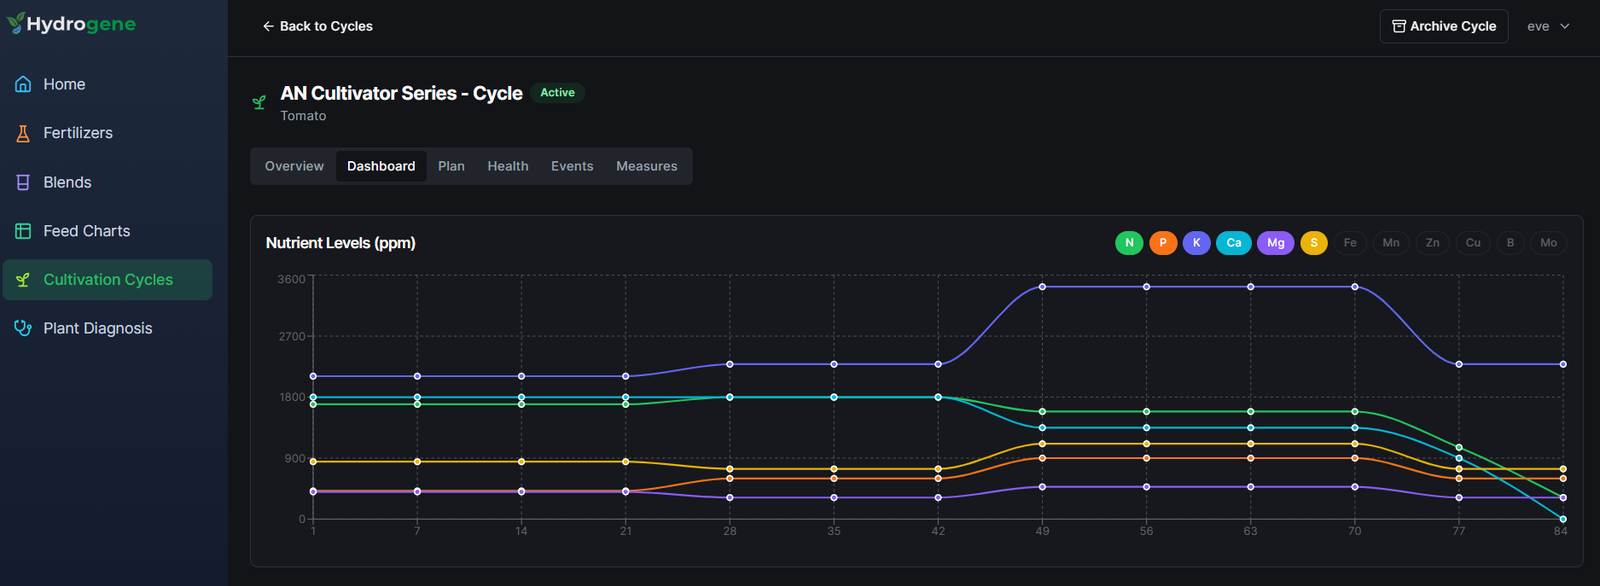
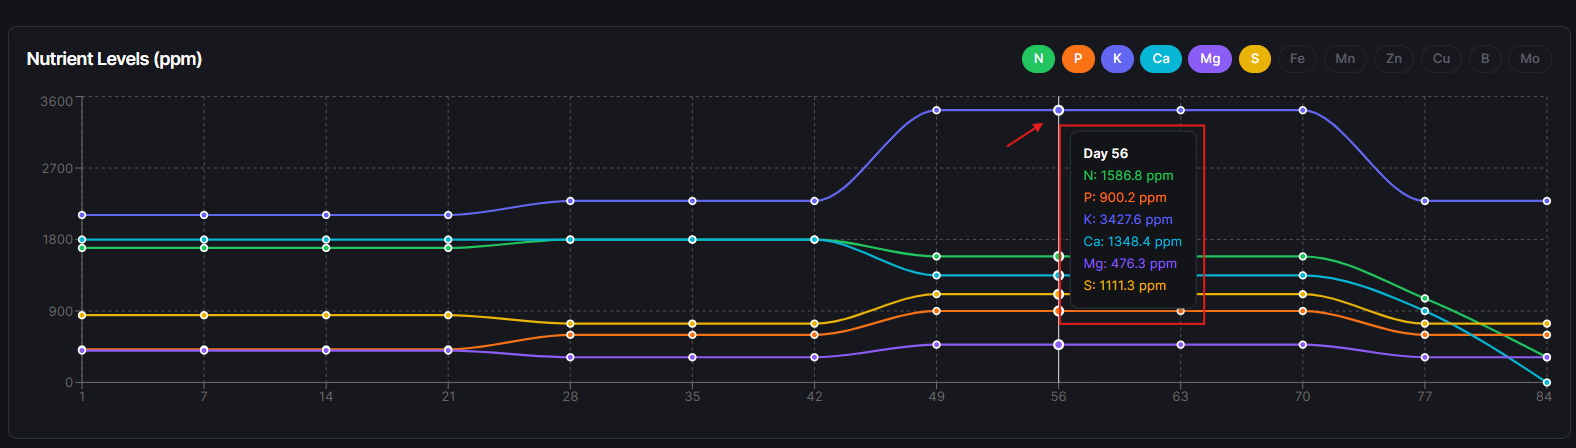
The first chart shows the expected nutrient levels in ppm for each cultivation week. Each color represents a different nutrient. Click on any cultivation day to see the expected values for that specific date.
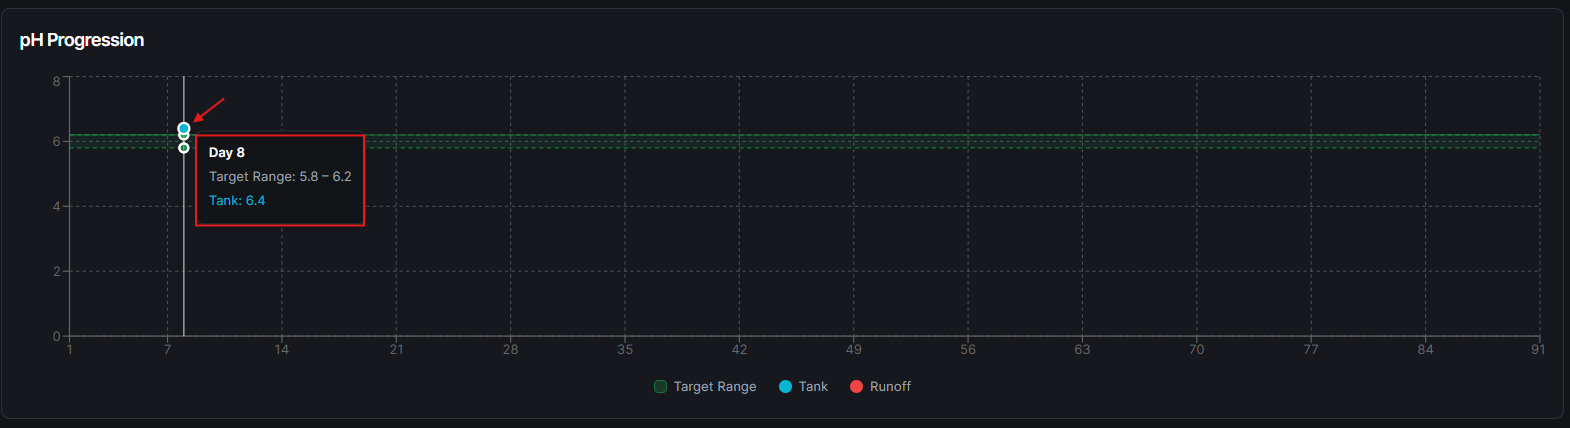
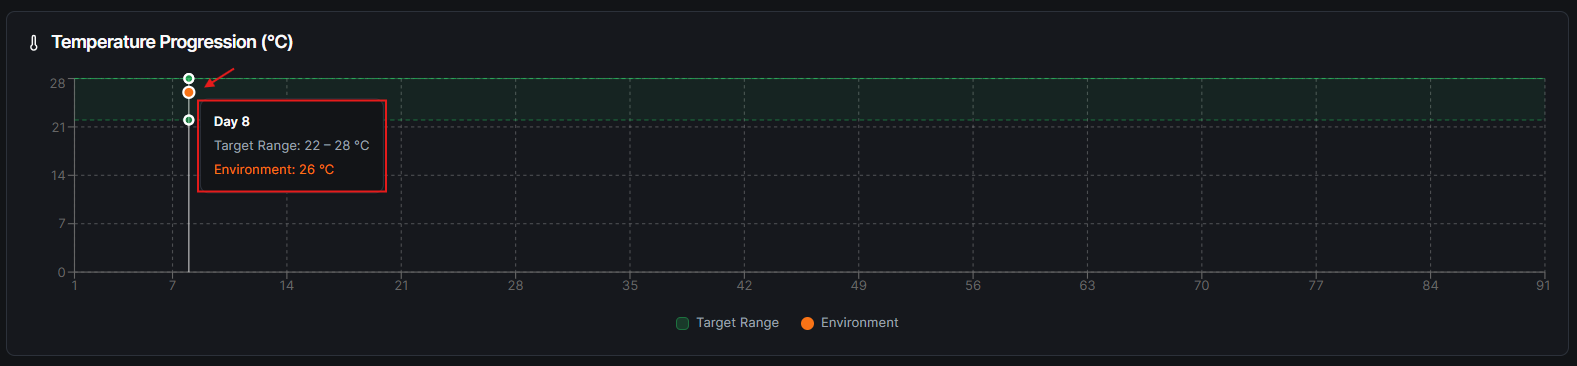
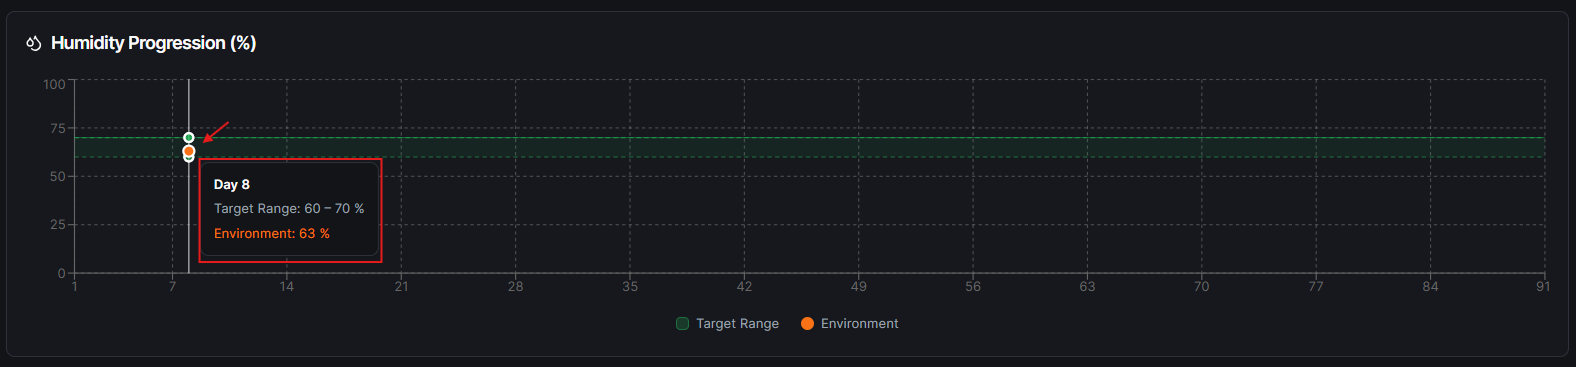
In the EC, pH, Temperature, and Humidity Progression chart, you can analyze the ideal EC, pH, and temperature ranges, as well as the measured values over the course of the cycle.
Plan Tab
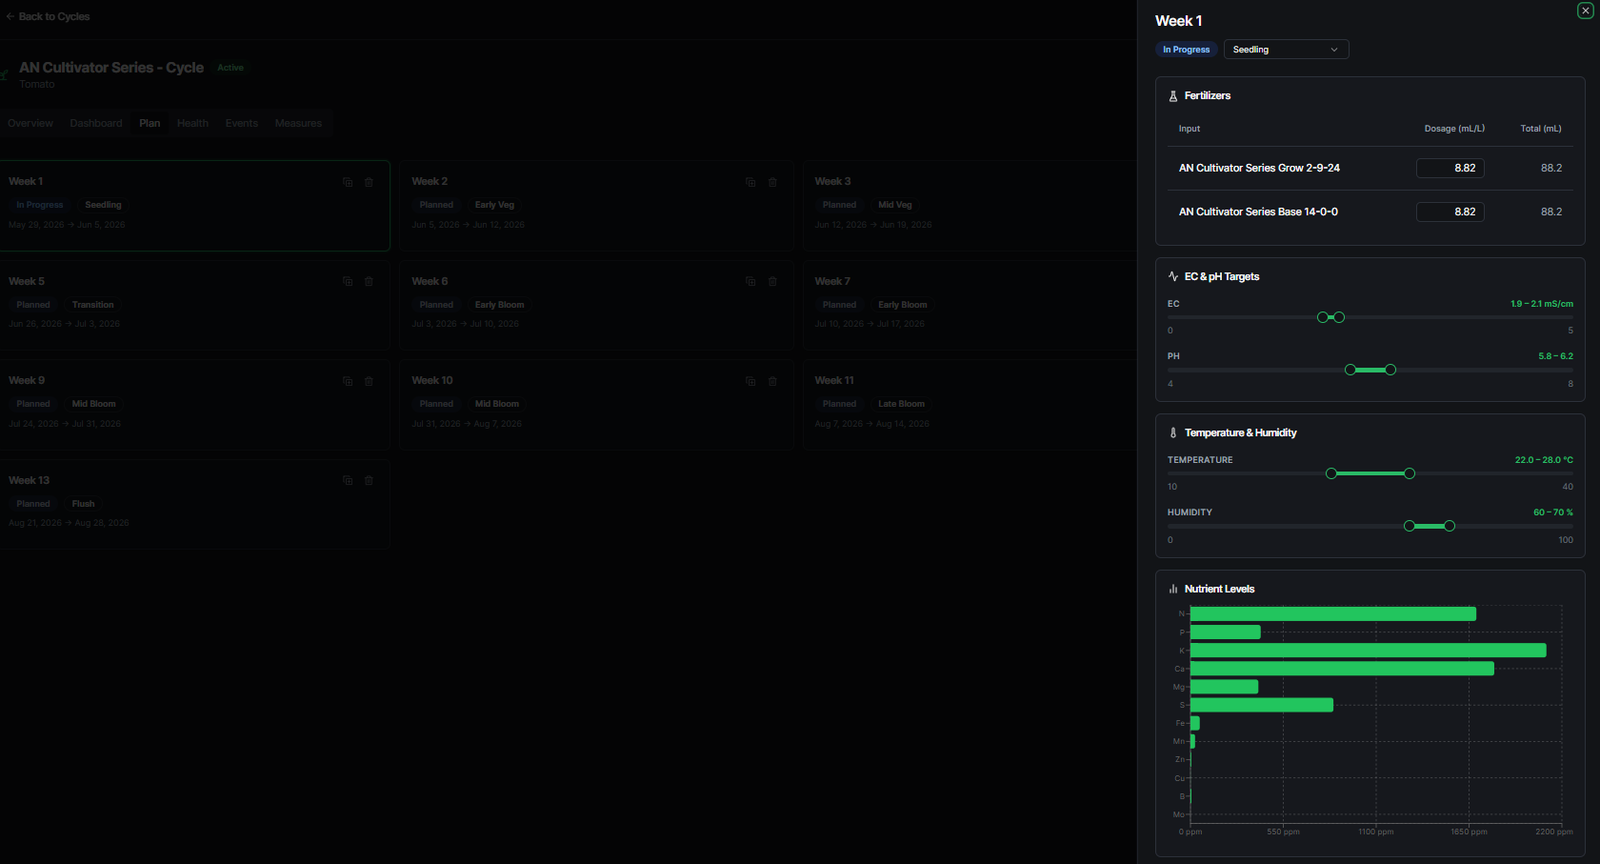
In the Plan tab, a preview of the cultivation week cards is displayed. Each card shows the week status, growth stage, and scheduled dates.
You can clone any week card to extend the schedule with additional weeks.
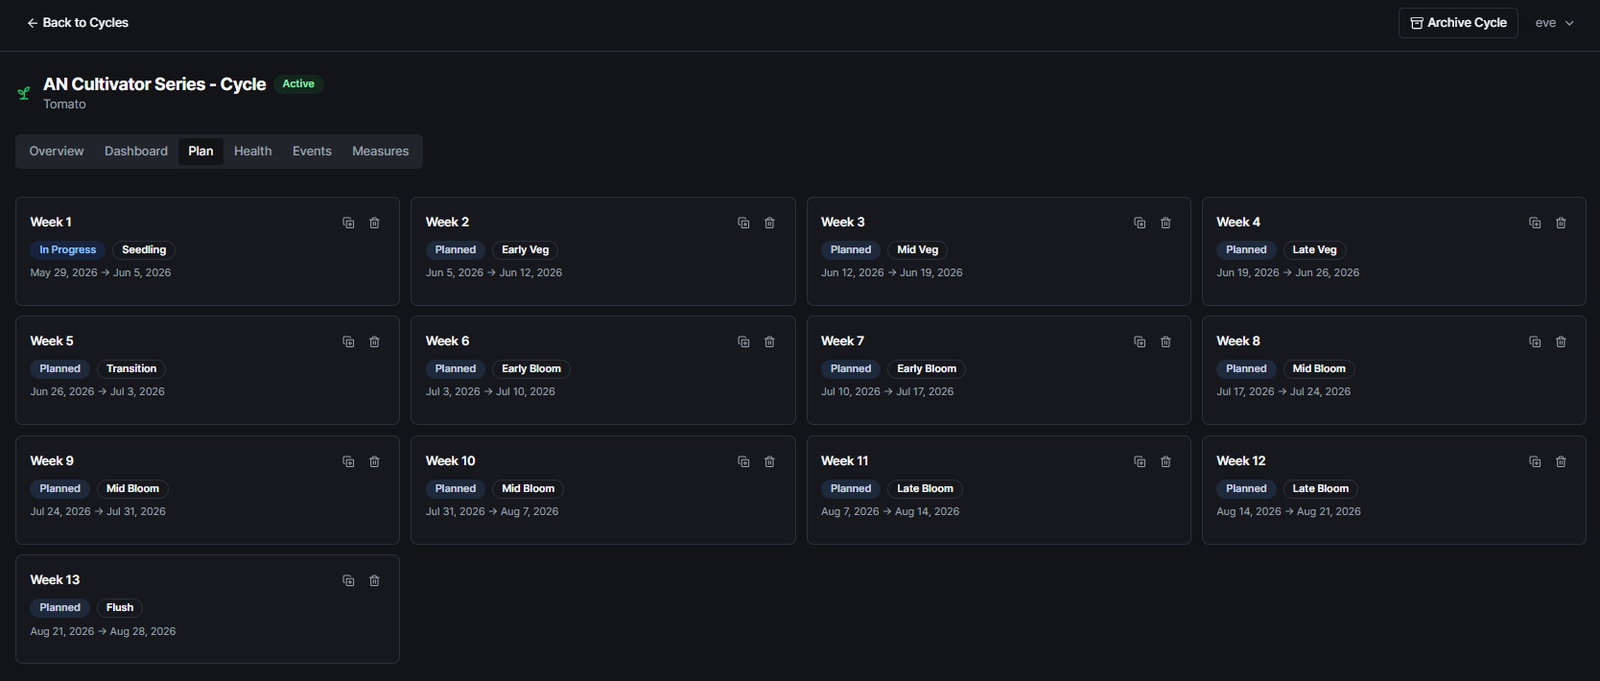
Clicking a week card opens a page with detailed dosage information, EC and pH target ranges, and temperature, humidity, and nutrient level targets.
Health Tab
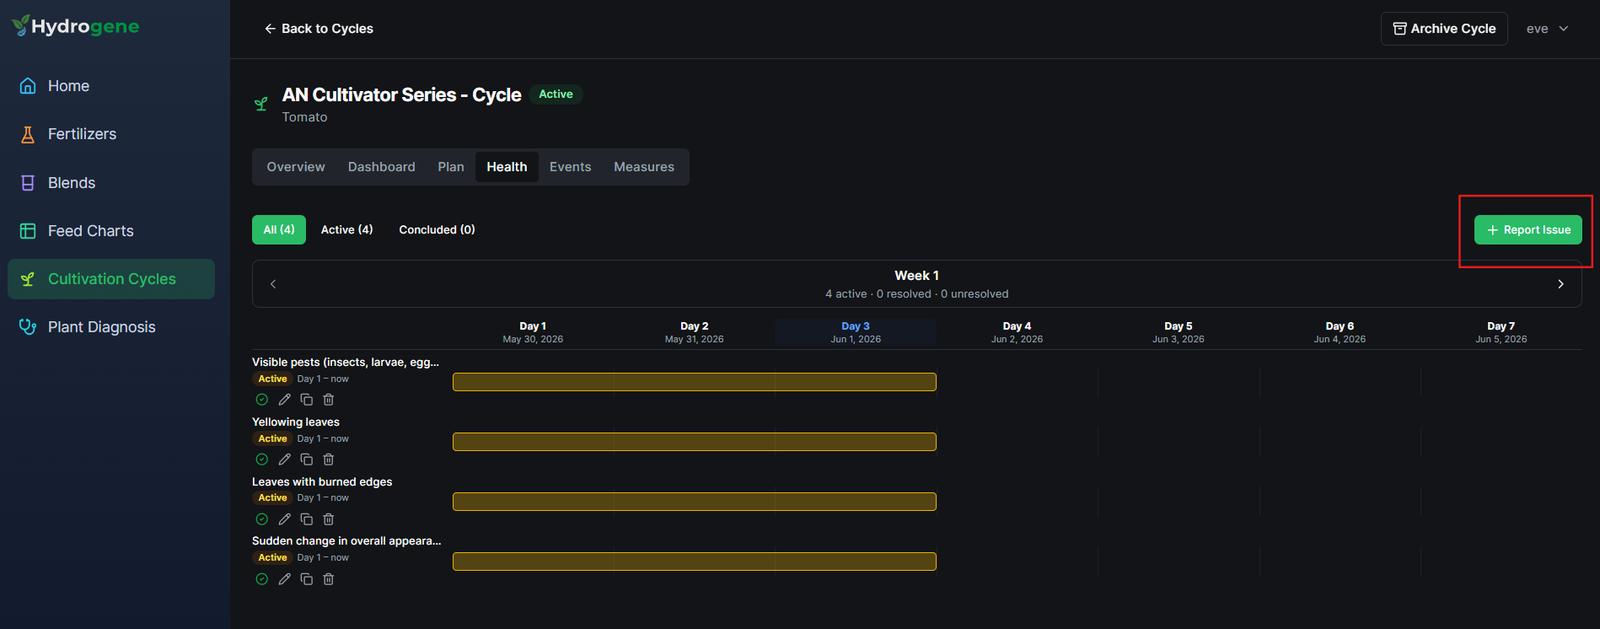
The Health tab is for recording plant health problems throughout the cultivation cycle. To report a problem:
- Click + Report Issue.
- Select the tags that best describe the problems observed in the plant or the grow as a whole.
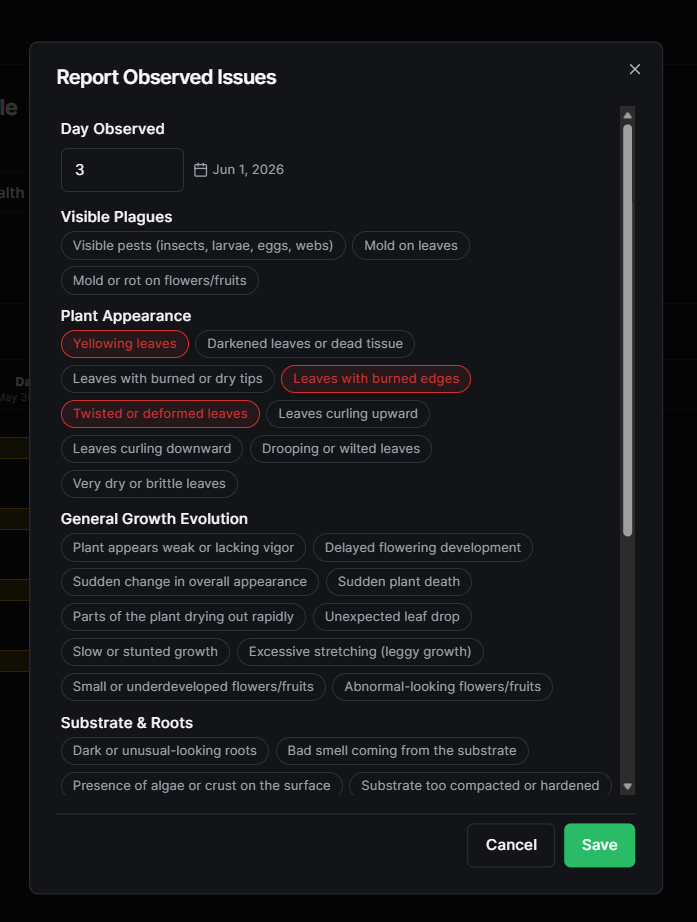
The Day Observed field is not editable. It corresponds to the cultivation day on which the problem record was created.
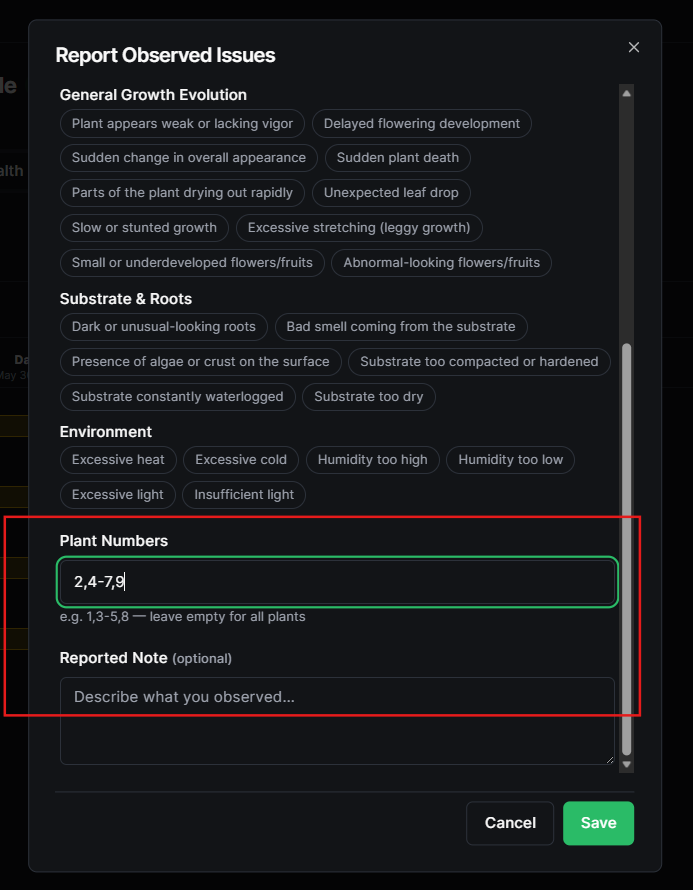
- In the Plant Number field, identify the plants affected by the reported problem.
For sequential plants, use a hyphen (e.g., 4-7). For individual plants, use commas (e.g., 2, 9).
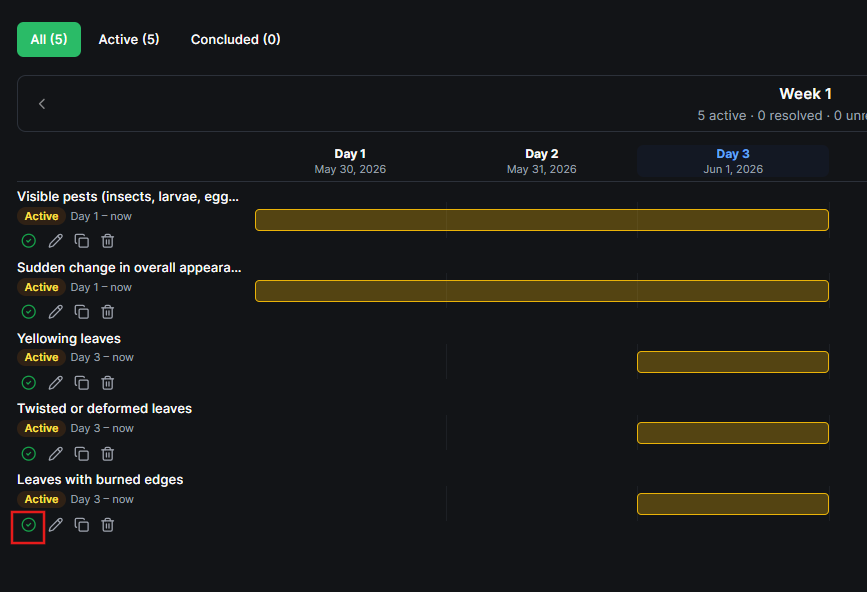
- Click Save. The problems will be displayed in the Health tab, showing the days they remained active.
-
You can edit the problem information, duplicate it, change the plant identification via Report Observed Issue, or delete it.
-
When the problem is resolved, click Conclude (the first icon in the action list).
- The Conclude Issue form will appear. Fill in the resolution status (Outcome) and describe what was done.
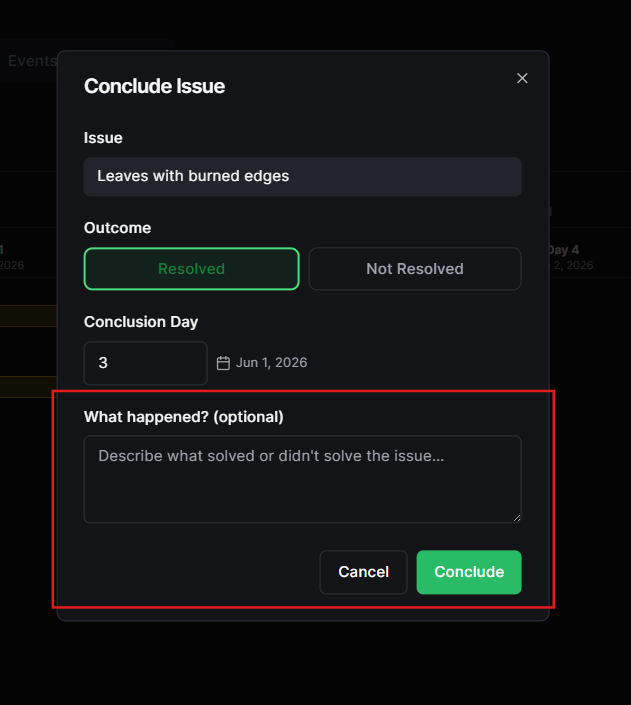
This information will be saved as a reference and may be used by Plant Diagnosis as a basis for suggesting solutions in similar future situations.
-
Click Conclude.
-
The status and color of the recorded problem will change to Resolved (green) or Unresolved (red), as shown below.

Events Tab
The Events tab is for planning and organizing cultivation events, such as irrigation, fertilizer application, transplanting, and other activities.
To create an event:
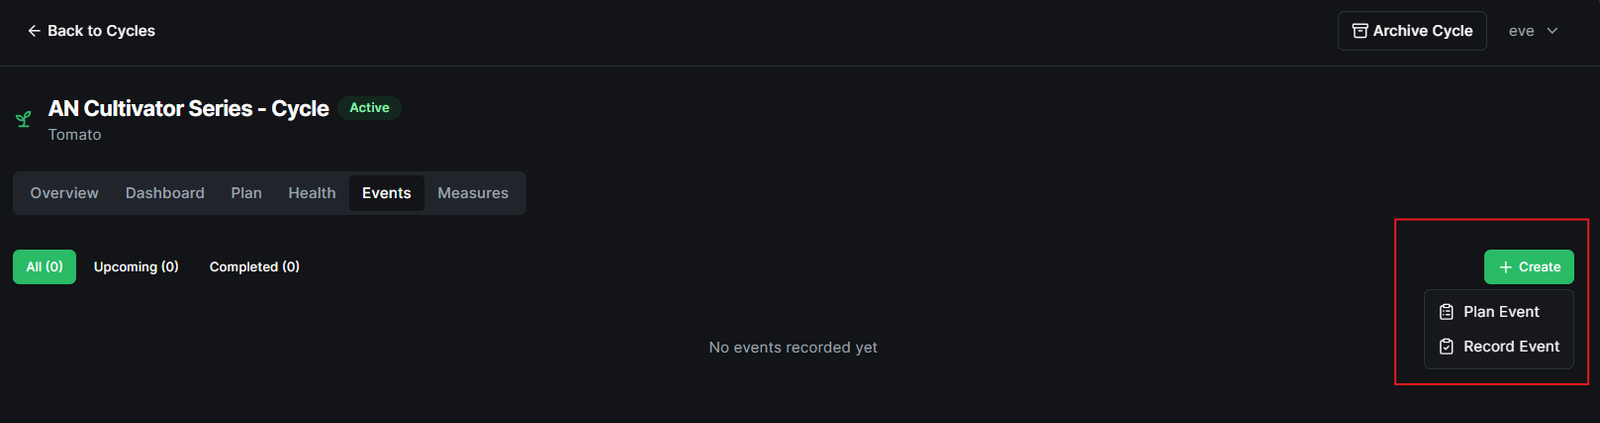
- Click + Create.
- Select Plan Event to plan a future event, or Record Event to record an event that has already occurred but needs to be logged.
-
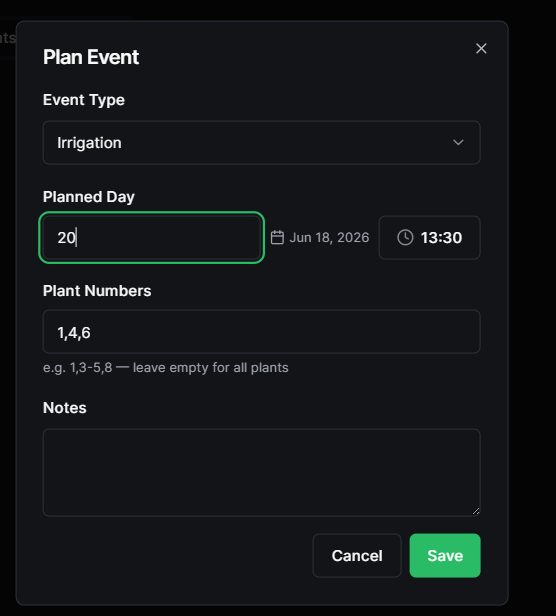
After choosing the appropriate option, fill in the event form:
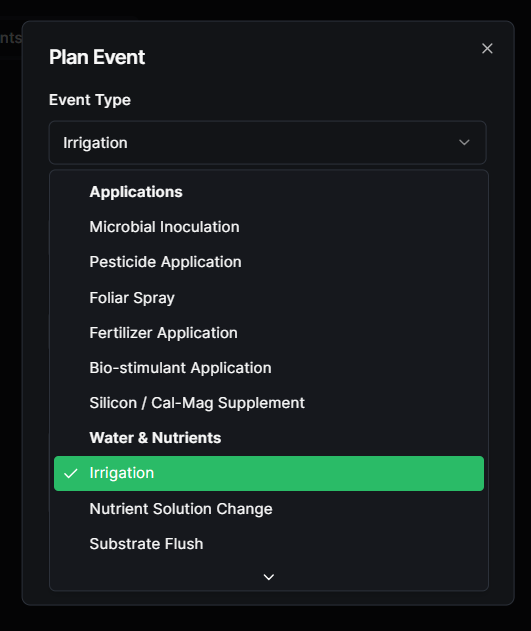
- Select the event type from the available list.
- Add the cultivation day you want to plan.
The date with day, month, and year will appear automatically alongside the cultivation day.
- Add the planned time.
Select the hour first, then the minutes on the clock.
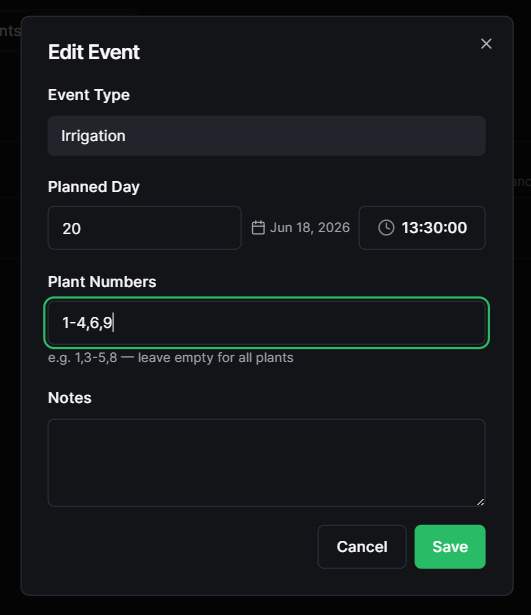
- Enter the identification number of the plants that will be part of the event.
For sequential plants, use a hyphen (e.g.,
1-4). For individual plants, use commas (e.g.,6, 9).
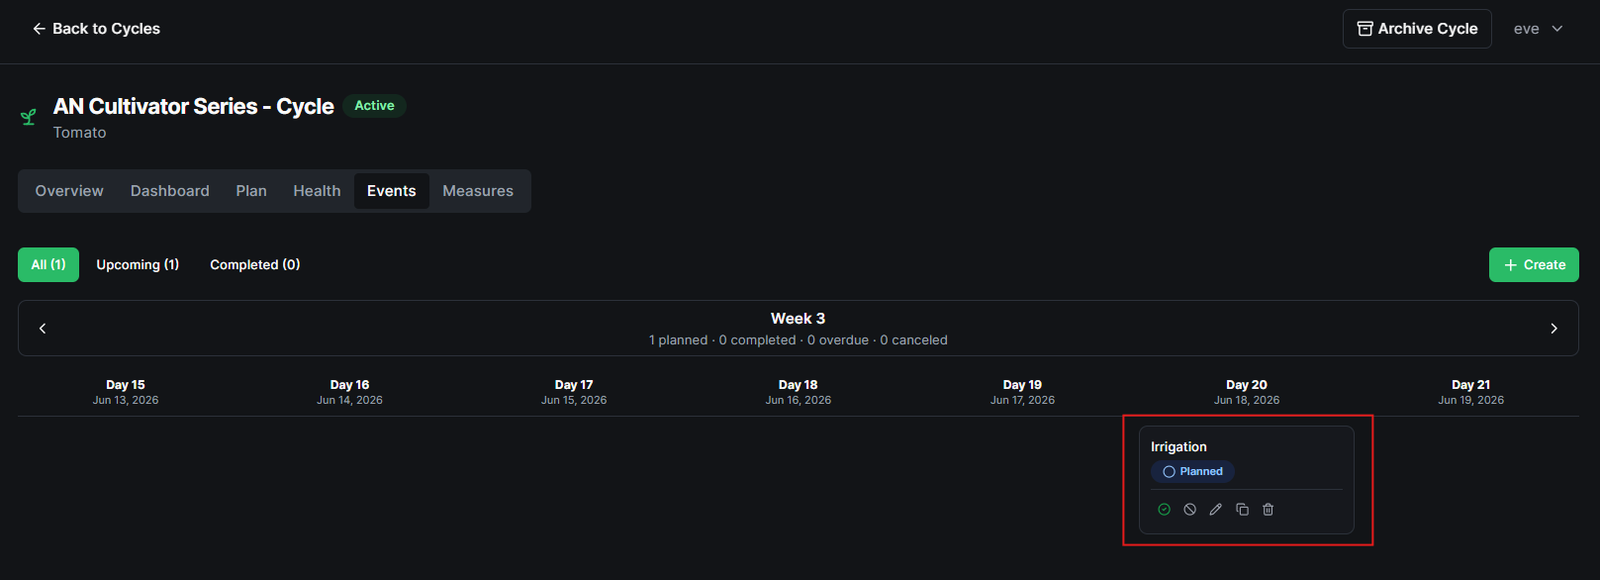
- Click Save. The created event will be displayed as a card with a blue Planned tag in the Events calendar.
- Using the icons at the bottom of the event card, you can:
- Conclude it (green Concluded tag)
- Cancel it (red Cancelled tag)
- Edit, duplicate, or delete it
Tips and Best Practices
- Start the cycle at the right time. The system uses the start date to calculate cultivation days for all measurements, events, and plan cards.
- Log measurements consistently. Regular, complete records make the Dashboard far more useful and improve diagnostic accuracy.
- Use plant numbers. Identifying which plants are affected by a measurement or event makes it much easier to trace issues back to their source.
- Close issues when resolved. Leaving issues open indefinitely inflates the Active Issues count on the Home page.
- Clone weeks when extending a cycle. If a crop grows slower than expected, use the clone function in the Plan tab instead of manually adjusting dates.
Related Features
- Feed Charts — The schedule that drives the cycle.
- Plant Diagnostics — Identify and troubleshoot plant health problems.
- Start a Cultivation Cycle — Step-by-step workflow.